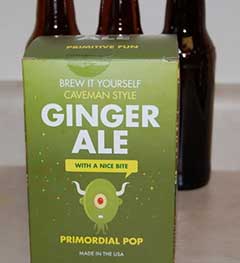
Reviewing the Copernicus Primordial Pop Ginger Ale kit.
After reviewing the traffic for this old post, it’s become very clear that there are people out there who are looking for information regarding this Ginger Ale homebrewing adventure kit.
I know it isn’t about my writing or one of my stories, but making this ginger ale was a lot of fun. It’s also a post about one of my other hobbies, and just like beekeeping, it tells a story about who I am. So, with that in mind, I’ve decided to bring it back.
This is a doozy of a post, folks, so be sure to bookmark it, pin it on Pinterest, or share it on your other social media profiles.

In this review, I’ll be walking you through the kit contents and what you can expect from the process. I made this Ginger Ale back in 2011. It was a great starter project, and it helped me learn a lot of the basics when it comes to brewing sodas and other drinks at home.
Making your own soda can be a lot of work when compared to the convenience of buying a finished product from the grocery aisle. There are certain factors that are very important to the process, such as sterilization. Introducing foreign bacteria into your brew could add some rather unsavory flavors to your soda. With this in mind, I decided to write a review on a soda making kit I was able to purchase off Amazon.com.
(If you liked this review and decided to try it out for yourself, please consider using my link as it helps me fund this site and I’ll be able to provide even more reviews in the future.)
Copernicus – Brew It Yourself – Caveman Style Ginger Ale: Kit Contents
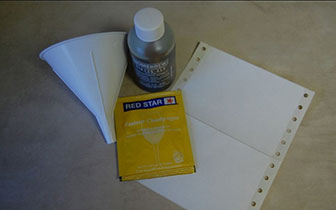
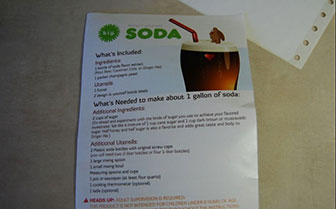
The kit includes Ginger Ale extract, a handy funnel, brewing yeast, bottle labels, and instructions.
This kit makes 1 gallon of soda.
Okay, let’s get this party started!
Don’t Forget:
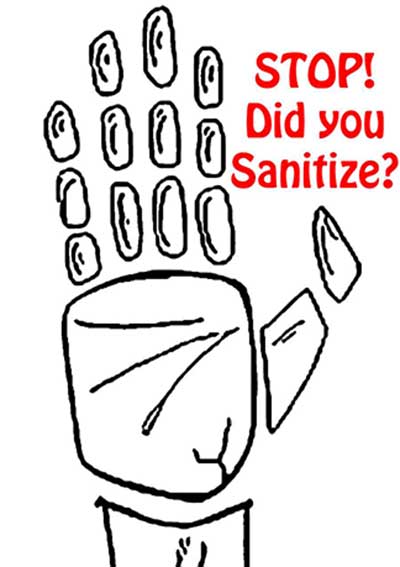
Some folks have complained that this kit produces an off-tasting soda. As is the case with all homebrewing ventures, having clean, sanitized work spaces, equipment, bottles, and caps will help prevent ruined batches.
Keys to Success:
- Clean and sanitize your work area!
- Sanitize your bottles and caps!
- Follow the instructions!
Hold up. Why does mine taste gross?
You may read some negative reviews of this kit, and while not everyone will enjoy the ginger flavor, there is also a measure of user error to consider.
One of the key ingredients to any homebrewing adventure is having a clean and sterile work environment and sanitizing your bottles, caps, and utensils.
By brewing your own soda, you are creating carbonation through the use of a specialized yeast strain. This yeast has been grown to provide the fizzy goodness without leaving a disgusting aftertaste. You’ll notice from the kit contents section above that the yeast used for this brew is Red Star Pasteur Champagne yeast.
Does it taste off-ish to you?
Common kitchen bacteria (not to mention any baddies growing under your fingernails) can drastically impact the flavor of your brew. Be sure to take a few extra minutes to make sure everything is clean before you begin.
A simple sanitizing solution can be made by mixing 1 tablespoon of bleach to 1 gallon of water. Allow to sit for about 20 minutes then rinse off bottles and utensils to reduce the chance of hanging onto any lingering chlorine flavor.
A clean work area is a happy work area.
Remember:
Sanitize your work space!
- Sterilize your bottles, caps, and any utensils you’ll be using to brew.
- Unwanted bacteria and native yeast strains can contaminate your brew and make it taste like butt.
- No one wants to drink a bottle of butt.
Did you know?
- Brewing your own soda with yeast uses the fermentation process to create carbonation. Soda’s short brew time halts the process and only trace amounts of alcohol are created.
- The process of brewing soda stops the fermentation cycle much earlier than if you were fermenting beer or wine.
- In an oxygen deprived environment, the fermentation cycle creates alcohol. In an open environment, the cycle continues through the process to produce vinegar.
- In ages past, it was very common for a family to brew their own beverages. These homemade drinks had many purposes. Some included beneficial herbs or roots and were used as a sort of tonic, others were for pure enjoyment.
- Modern soda making practices do not use yeast to create carbonation. You’re likely to find CO2 cartridges and syrup behind your favorite fizzy drinks.
Are you ready to make some Ginger Ale?
Prep the Sugar.
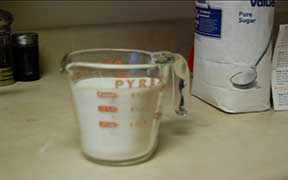
Go ahead and measure out the correct amount of sugar you’ll need for the recipe. When brewing your own beverages with yeast, the sugar is used as fuel for the carbonation process. Yeast eat sugar and release carbon dioxide, which is what causes the drink to fizz.
Some of the sugar used in this recipe will be consumed by the yeast to produce carbonation, while the rest will remain to sweeten the beverage.
When making wine or beer, all, or most, of the sugars are consumed by the yeast until either they run out of food or the alcohol content becomes greater than the hospitable range of the strain.
Many different types of sugar can be used. For example, mead (also known as honey wine) is an alcoholic beverage made from fermenting honey water. Traditional wines use the natural sugars of fruit to fuel the fermentation process.
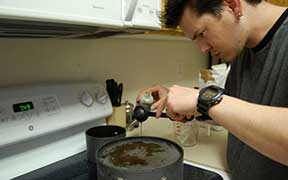
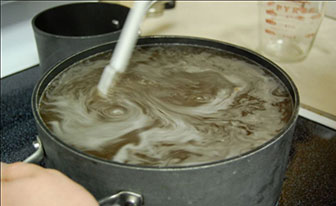
Heat the Water.
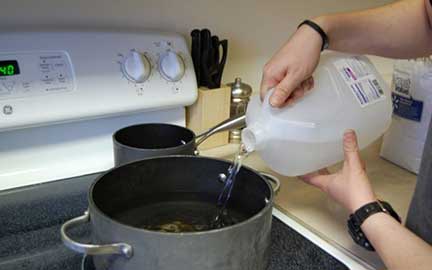
Let’s start cooking!
In this step, you’ll see that I have two pots on my stove’s heating range.
The larger pot will be used for mixing the ingredients for my soda, while the smaller pot will be used to boil water I’ll need to sanitize my metal bottle caps.
Make sure you select a pot that will be big enough to hold all your ingredients!
Adding and Dissolving the Sugar.

Heat your water, pour in the sugar, and stir until the sweet stuff has fully dissolved.
While the water is heating to a boil, you can begin activating your yeast.
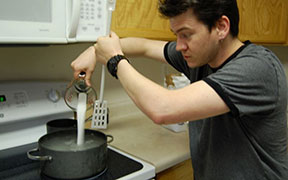
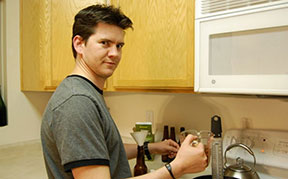
Activate the Yeast!

First things first…
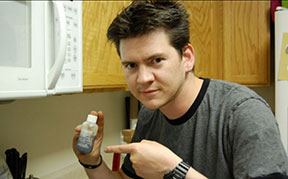
Open the packet of yeast.
(Just a note here: I didn’t really tear open my yeast packet with my teeth.)
Measure out the correct amount of yeast as per the instructions and add to a cup of lukewarm water.
Hydrating the yeast in lukewarm water helps wake it up from stasis in a nice comfortable environment. You will wait until your brew has cooled to a moderate temperature before adding the yeast. This helps prevent losing your yeast to shock.
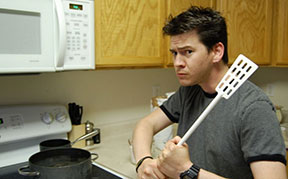
Hey… wait a second… All we have is warm, sweetened water…
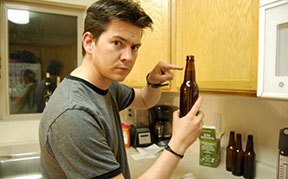
Add the flavoring!
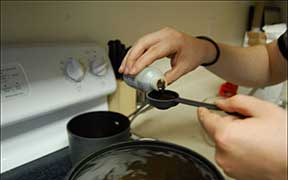
Carefully measure and add the correct amount of flavoring. You’ll notice I had enough for another batch. Don’t add too much!
Now we’re getting somewhere! Stir, you crazy beast, stir! And then onward to the bubbles…
Add the yeast.
It’s very important to allow your brew to cool to a lukewarm temperature before you add your activated yeast.
Give it a good stir for even distribution. Remember, don’t just toss your yeast into the brew and hope for the best. Activate the yeast first and only add it to the brew once it has sufficiently cooled. Adding it while the mix is still hot will kill the yeast and leave you with no carbonation.
Time to Bottle!
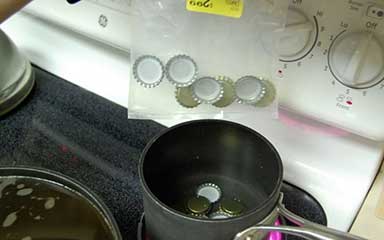
By now, you should have your caps sanitized and ready to go. If not, go ahead and get them cleaned up before you continue.
Since I used glass bottles for my brew, I had to get these special bottle caps.
If you’re just starting out, you can reuse plastic soda bottles. In fact, that’s what the instructions recommend. Remember, this is a kit for beginners, and it’s okay to be a beginner and just focus on the process. If brewing beverages at home is something you find you enjoy, you can always spring for fancier tools and containers.
Sponsored content:
Now it’s time to bottle your Primordial Pop Ginger Ale! As I mentioned before, I’m using glass bottles, so it’s a little more complicated but still pretty easy. An important thing to remember, regardless of whether you’re using glass or plastic, is to leave about an inch and a half or so of air space in each bottle. As the yeast consumes the sugar, CO2 is produced and builds pressure. Without this air space, one of two things will happen: either your cap will pop off or the bottle will burst.
You should also note that your yeast will consume sugar and reproduce far more rapidly at 80 degrees than at 65. This will result in a quicker carbonation process and pressure will build much faster. Once the bottles have had enough, they will explode and leave a sticky mess everywhere and may also cause an injury if someone is unfortunate enough to be in the wrong place at the wrong time. Check your bottles regularly. If you’re unsure, you may want to open one early to test the pressure. Better safe than sorry. After you’ve done this a few times, you become more comfortable with what the conditions of temperature and yeast variety will produce. Even so, always keep safety at the forefront of your homebrew process. Just remember, brewing at different times of the year under different temperature conditions can alter the speed with which your brew carbonates and builds pressure.
Other than that, it’s pretty straightforward. Place the cap on the bottle, crimp it down with the capper. If you’re using plastic, just twist the cap down until it’s nice and snug.
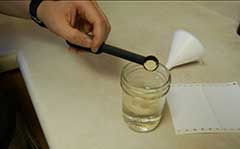
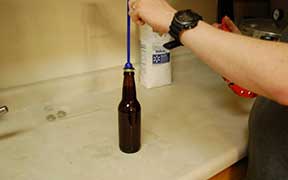
Fill those bottles!
Admit it. You’ve been dying to use the cute little funnel that came in your kit!
But leave some head room. If you fill them too full, there will be no space for the carbonation to build.
Place the sanitized caps on the bottles, while taking care not to get them contaminated.
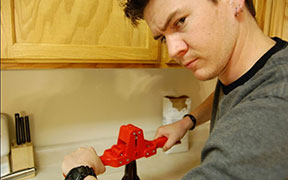
Twist your caps tightly. Or, if you’re using glass bottles, use the crimp too to affix the bottle caps in place.
Final Thoughts:
This was a great starter kit and made a very palatable ginger ale soda. It’s a little expensive to keep on the shelf, but I believe it’s a great introduction to the world of homebrewing and naturally carbonated sodas. Once you’re familiar with the process, you can piece together your own ingredients for much cheaper.
I think this would be a great family activity and it would serve as a wonderful science experiment that kids can really enjoy. There are so many great lessons here! Such as, the importance of proper sanitation, chemical reactions and fermentation, and kitchen safety.
Did you enjoy this review?
Share this Post